
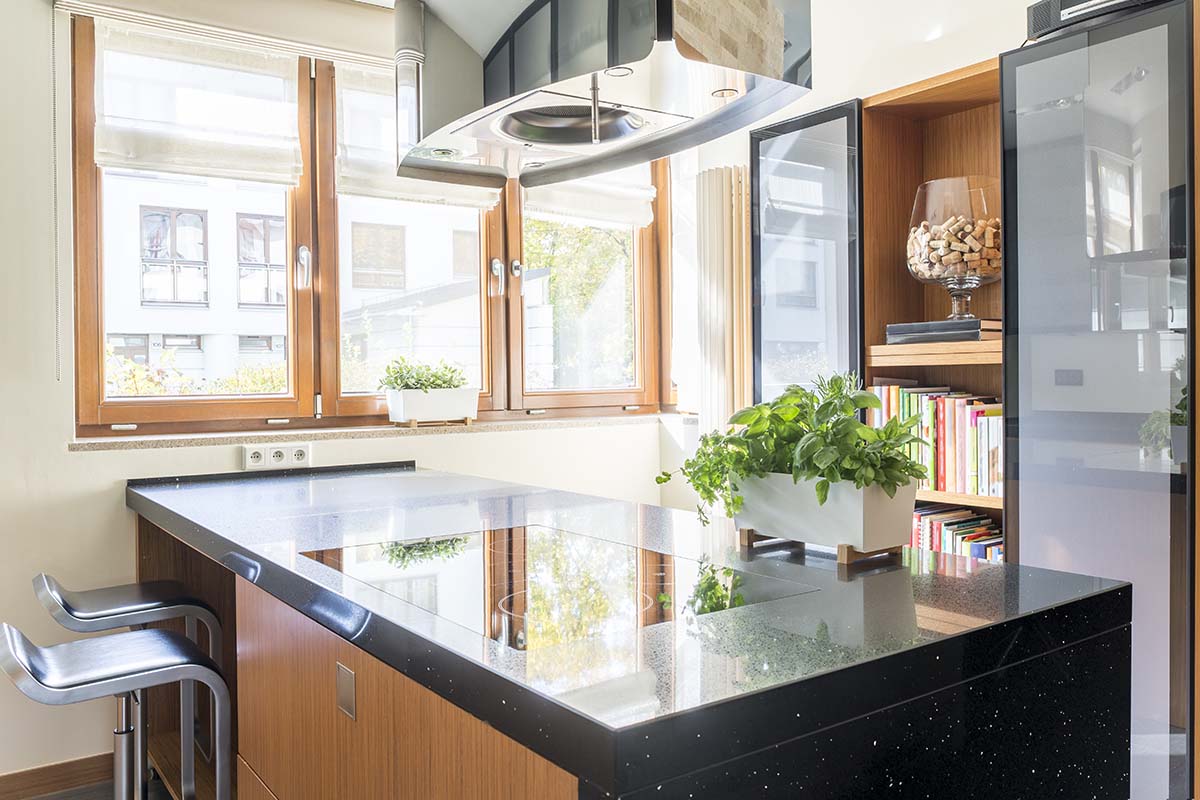
In recent years, the trend of merging the kitchen and dining area into a unified space has gained significant popularity. Many contemporary homeowners specifically opt for this layout for their homes or apartments due to its numerous benefits. Perhaps the most evident advantage is the enhanced sense of spaciousness it imparts to the area. Furthermore, it affords you the opportunity to craft a kitchen that is not only more functional but also aesthetically captivating.
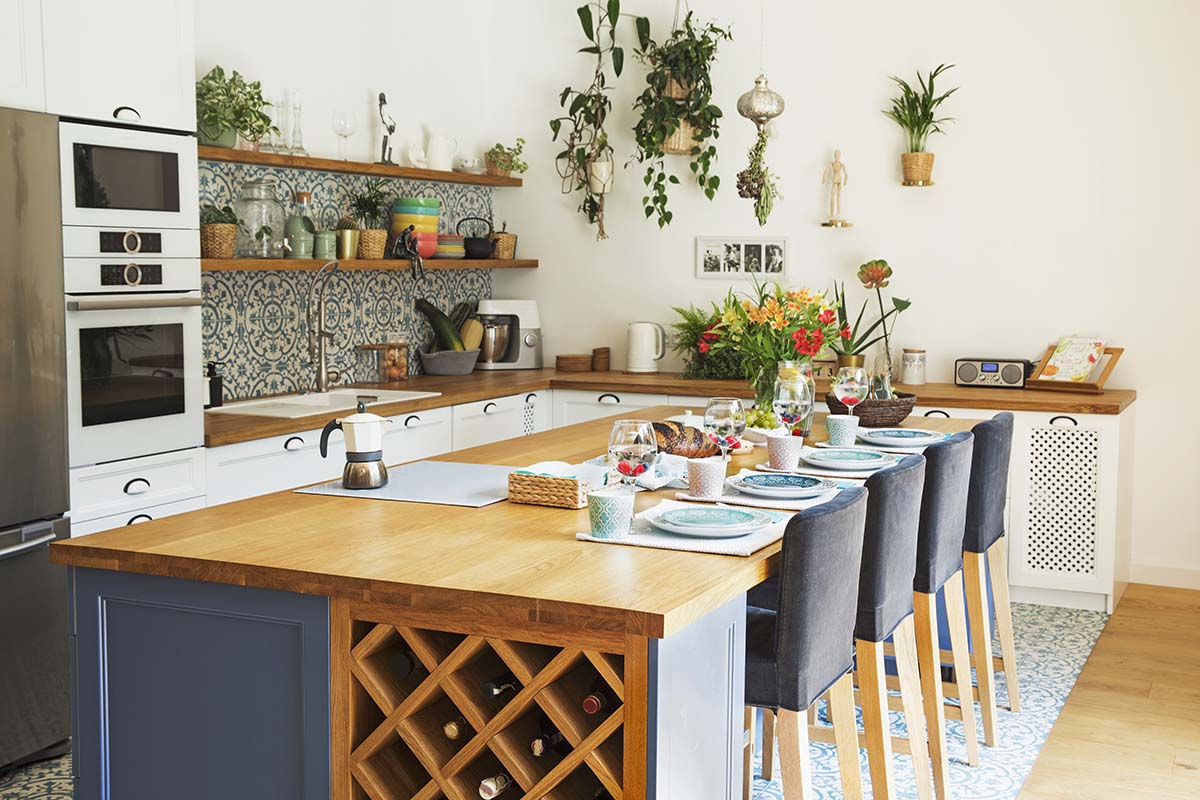
One great way to enhance the look and layout of this room is by adding a kitchen island. This versatile piece of furniture offers both practicality and multifunctionality. It can serve as a storage cabinet for groceries and cooking utensils, double as a convenient worktop, or even function as a casual seating area. Additionally, there are numerous other creative ways to utilize this unit to enhance the room further.
When considering adding a kitchen island to your culinary area you basically have two options – to hire kitchen renovation specialists to do the job for you or to tackle the project on your own. It goes without saying that opting for professional services is the most reliable route to achieving the best results. However, if you possess some DIY skills and relish hands-on projects, why not embark on creating your own kitchen island?
If you're seeking guidance or inspiration for DIY kitchen island ideas, stay tuned for what's coming up in this blog post.
Let's start with the fundamentals: Planning and Preparation
Creating your own kitchen island can be an immensely satisfying DIY project. It can save you money, enhance your skills, and give you a sense of accomplishment. However, building a DIY kitchen island is not a very simple project. Even if you don’t want to make very intricate designs, you will need to have some basic skills and access to some basic tools. In addition, you will have to carefully plan and design your kitchen island. And, this step is as important as your skill level.
A well-thought-out plan will serve as a clear roadmap for every construction phase, minimizing the chances of mistakes or rework. Plus, it will boost your confidence in executing the project successfully. In this regard, let's move to the essential part and see what tools and materials you will need and how to plan and design your DIY kitchen island before starting the actual construction.
What tools and materials you will need to build a DIY kitchen island?
Although the specific tools and materials you will need may vary depending on your design and customization choices, there are some basic things that are required for most DIY kitchen island projects. Here is a list of items you should consider when getting ready for the task.
- Plywood or lumber for the frame and panels;
- Screws and nails;
- Wood glue;
- Countertop material (e.g., butcher block, granite, laminate);
- Cabinet hardware (handles or knobs);
- Paint or stain (if you want to finish the island);
- Sandpaper;
- Tools (e.g., saw, drill, screwdriver, measuring tape, level).
In order to determine what instruments and materials you will exactly need, you should first define your project's objectives. Do you want to have some extra cabinets or maybe a bookshelf kitchen island? Are you planning to renovate an existing cabinet or begin entirely from scratch? Will you be painting your new island, and if so, what colour scheme are you envisioning? These are some pivotal questions that can help you decide what tools and materials to buy as well as determine the approximate cost of your project.
What factors to consider when designing your new kitchen island?
Here are some key factors to ponder when devising your DIY kitchen island.
- The current layout of your kitchen and the exact location of the island. Take a look around your kitchen space and think about what is the most suitable place to set your island. Consider where the new unit can fit comfortably while leaving enough room for traffic flow.
- The size and shape of the island. Determine the appropriate size that harmonizes with your current kitchen layout. If you have a small kitchen, for example, opt for a compact and minimalistic island. Conversely, if you have a spacious room, you can explore the option of constructing a larger island, complete with ample storage, drawers, and shelves. Also, make sure to choose a shape that aligns with your kitchen's flow and aesthetics.
- Storage requirements. Think about whether you want to simply make additional cabinets for some extra storage space or you want to incorporate some pull-out drawers to keep your kitchen utensils. Consider any special features that you want to add to your new island such as a slide-out garbage, wine racks, a handy bookcase or anything else.
- Material selection. Decide what kind of materials you want to use for the cabinet boxes and countertops. Ideally, you will select them to match tour existing cabinetry. You may opt for ready-to-assemble kitchen cabinets and island components and assemble them on your own or repurpose some old items (like old shop cabinets, dressing tables, etc) and turn them into an island.
The beauty of tackling a DIY endeavour like this lies in its flexibility. You can tailor the complexity to your preferences, ensuring that your kitchen island aligns perfectly with your vision.
How to build your own DIY kitchen island: step–by–step?
Once you've contemplated some crucial considerations and decided on the design that suits your requirements, you're ready to embark on your DIY kitchen island project. To get started, you can follow this easy tutorial provided below.
Take the necessary measurements and cut the pieces
Begin with measuring your kitchen space to determine the perfect size for your island. After you've established your preferred dimensions, proceed with cutting the wooden pieces accordingly.
Build the base frame and add panels
Once you've cut all the pieces to the desired sizes, the next step involves assembling the base cabinet or frame of your kitchen island. If you're working with reclaimed wood or repurposing existing furniture, begin by carefully sanding it down and positioning it in the designated location.
In case you are planning to upcycle your current cabinetry or another piece of furniture, it's important to ensure the individual components are securely fastened to one another. This step is crucial to prevent any shifting or movement when you start installing the new countertop or any other customized features for your kitchen island.
To attach the panels to the frame use screws and glue. You can also add a toe-kick panel to the front for a finished look.
Install countertop support
If you want to build a kitchen island with an overhanging countertop for additional seating, then it is good to consider adding some extra support for the surface.
To achieve this, employ spare plywood or sturdy stud wood pieces to craft supplementary framing extensions that project from the core of your island. Conceal these extensions with the material of your choice for the island's sides. This allows you to create a secure overhang for additional seating.
This step is essential in guaranteeing the long-term stability and durability of your counter, preventing it from sagging, cracking, or breaking with time.
Add cabinet hardware, sand and finish
If you want to incorporate features like shelves, a pull-out garbage bin, or storage cabinets, this is the moment to proceed with their installation. If you are turning old furniture into a kitchen island then consider the opportunity to update the existing hardware with something more captivating or contemporary to enhance the overall look and functionality.
Following this, address any holes or cracks, smooth the surface through sanding, and, if you prefer, apply a stain or paint to achieve the desired finish.
Install the countertop
Trim your selected countertop material to match the dimensions, then position it atop the island's base. Next, fasten the counter firmly using screws from beneath, ensuring it's level and securely anchored. If you're working with a pre-made or solid countertop piece, just set it on the base and secure it with screws.
Make any final adjustments and clean up your workspace
Make sure that you make any final adjustments needed and ensure everything is secure. You may also consider adding some personal touches such as hanging pendant lights for a touch of ambience, crafting a unique backsplash using captivating tiles, or injecting a playful burst of color with paint or wallpaper.
With the staining and finishing complete, and all your desired features in place, your kitchen island project is finished, and it's time to tidy up. Remove any painter’s tape, thoroughly sweep and vacuum to eliminate dust, and give the island's sides and surfaces a thorough wipe-down.
Inspiring DIY kitchen island ideas
Now that you've mastered the fundamental steps for crafting a kitchen island, it's time to unleash your creativity and fashion a practical yet chic centerpiece. Seeking inspiration? In this section, we'll present you with a selection of DIY kitchen ideas worth exploring.
Construct a unique island by using reclaimed wood
Are you looking for a stylish yet budget-friendly DIY kitchen island solution? Why not check the local reclamation yard for reclaimed pallet boards? Renowned for their robustness and thickness, pallet woods can be an excellent choice for building a kitchen island. You may simply ask for them to be cut to your desired dimensions. After that, you will just have to construct the basic frame by securely fastening the three sides together and covering the rare with horizontal boards.
Building a kitchen island using pallet wood is a great way to add character and an industrial vibe to your cooking space.
Repurpose an old bookshelf into a functional island
It is an easy DIY project and at the same time, it can really enhance the aesthetic of your kitchen space. All you need is an old bookshelf and a dash of creativity. The possibilities are virtually endless. You can transform it into an open-shelving kitchen island, making it the focal point, and enhance its charm by incorporating beadboard inlays on the sides.
Another option is to remove the back panel and give the bookshelf a fresh coat of paint that matches the other kitchen cabinets or flooring. Another idea is to replace the top with a butcher block or stone counter for added functionality and style.
This kitchen island offers full customization to suit your unique design preferences. Begin by selecting a bookshelf of your choice as the foundation, and if desired, you can trim taller bookshelves to your desired height.
Consider building a rolling kitchen cart
For a versatile DIY kitchen island, consider a rolling kitchen cart. This portable option can serve as a food prep surface, a bar, or even a dining table.
With such a kitchen island you have the flexibility to tuck it against a wall when it's not in use, roll it out next to your dining table to serve as a buffet during gatherings, and even take it outdoors to provide additional surface area when you're grilling.
If you want you can customize the new unit based on your desires, for example, to include a towel rod, cutting board, and two shelves for storage.
Transform an old dresser into a freestanding island
This budget-friendly DIY project offers a creative way to infuse character and functionality into your kitchen. You'll need only basic tools and some minor building skills to get started. The resulting unit can serve as valuable extra storage space. Additionally, you can explore the option of installing open shelves on one side to proudly display your favourite dishes and cookbooks, adding both utility and visual appeal to your kitchen.
The first step is to choose a dresser that fits the size and style you want for your kitchen island. Such old furniture can be perfect for creating a large island with farmhouse char or a small open shelving delight. The customization possibilities are vast - you can opt for staining or choose painted finishes to match your decor. Alternatively, consider installing new cabinet doors and drawers, along with a stunning butcher block counter, to further enhance the appeal and functionality of your kitchen island.
If you want your freestanding island to be mobile, attach caster wheels or furniture glides to the bottom of the legs. This will allow you to move the island easily.
Create a multi-level kitchen island
This is an excellent way to maximize both functionality and aesthetics in your culinary space. You can start with a pre-existing kitchen island or build one from scratch using wood or other suitable materials. On one side, you can designate a dedicated area for food preparation, complete with a butcher block countertop. Meanwhile, the other side of the island can serve as extra kitchen storage for appliances and cookware, ensuring a harmonious blend of practicality and style in your space.
Depending on your needs, you may consider adding a shelf, drawers or a wine rack to the island. You may also incorporate some interesting elements made from molding, beadboard or even barn wood.
Nonetheless, it's worth noting that undertaking such a DIY project can be relatively intricate, especially if you're starting from scratch. Additionally, remember that it typically demands more floor space. Consequently, attempting to install such a unit in a small kitchen may not be the most practical choice.
Frequently asked questions
Are kitchen islands going out of style?
Kitchen islands remain a popular and versatile feature in modern homes. While design trends may evolve, the functionality and convenience they offer are enduring. Their enduring appeal means they are not going out of style anytime soon.
Can I make a DIY kitchen island out of base cabinets?
Absolutely, crafting a DIY kitchen island from base cabinets is a practical and creative choice. You can repurpose two stock cabinets to serve as the foundation for your island, and then customize it according to your needs. You can use the helpful tutorial provided above to assist you throughout the process.
What kind of paint should you use for a kitchen island?
When painting a kitchen island, it's essential to use paint designed for high-traffic areas and durability. For the countertops, make sure to choose a paint that has some degree of water resistance. A semi-gloss or satin finish paint is a good choice as it's easy to clean and can withstand everyday wear and tear. Ensure you prep the surfaces properly and apply a primer before painting for the best results.
What can I repurpose for a kitchen island?
You can get creative when repurposing items for a DIY kitchen island. The possibilities are virtually limitless! You may repurpose unused items such as dressing tables, old shop cabinets, two stock cabinets, a chest of drawers, etc. Surprisingly, even elements like old cabinet boxes, cupboard doors or an old tabletop can be reinvented into a functional and fashionable kitchen island. Find inspiration in the DIY kitchen island ideas we've shared above to infuse your space with a truly unique character.